Add Template
Click the Add Template button to display the Add Template dialog to add a new template to the configuration.
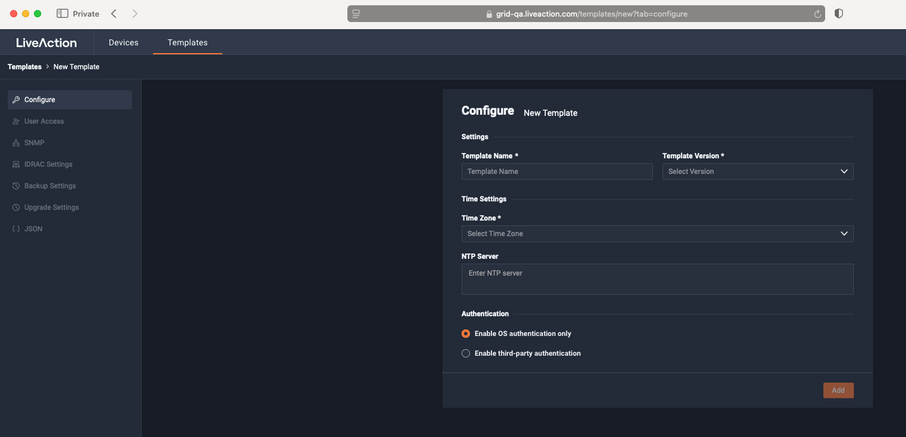
◦ Template Name: Type a name for the template.
◦ Template Version: Click to select the version of the template you are configuring.
◦ Timezone: Click to select the timezone for the template.
◦ NTP Server: Enter the address of any NTP servers to add to the configuration, and then click Add Server.
◦ NTP Servers: Displays the list of NTP servers added to Settings. You can click the Edit icon to edit an NTP server in the list, or click the Trash icon to remove an NTP server from the list.
Authentication
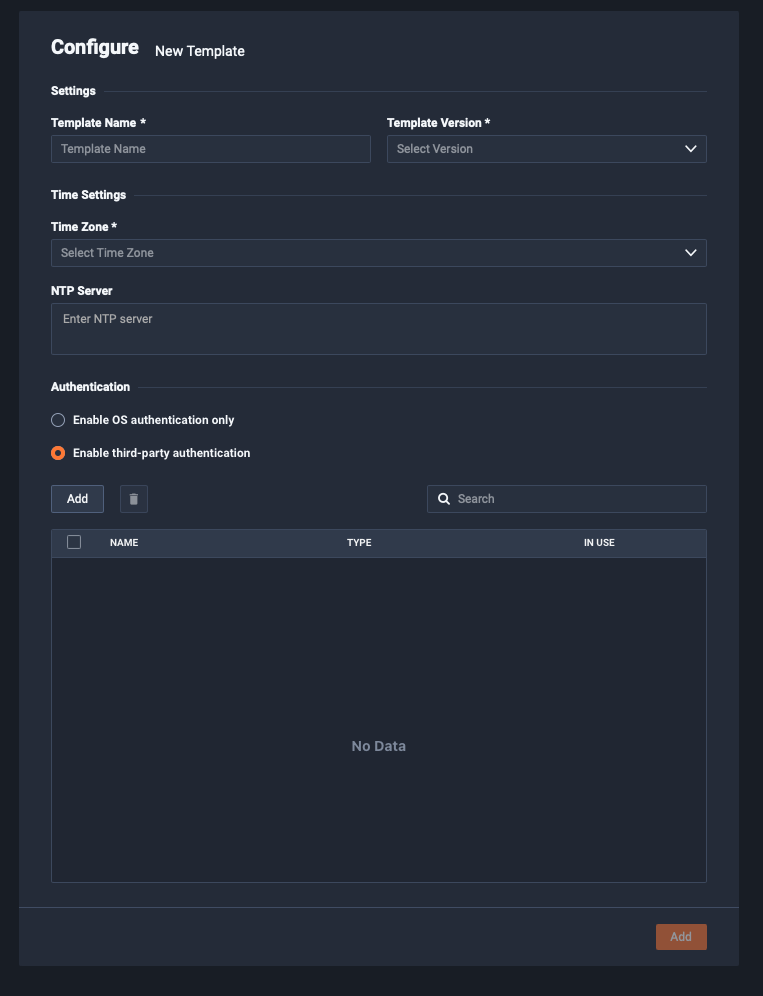
◦ Enable OS authentication only: Select this option to use the local OS authentication.
◦ Enable third-party authentication: Select this option to use TACACS+ or RADIUS authentication. If this option is selected, click Add to configure the new authentication setting.
◦ Add: Click to add a new authentication setting. You will need to configure the new authentication setting.
◦ Search: Enter the text string to search the list of authentication settings.
◦ Name: Displays the name of the authentication setting.
◦ Type: Displays the type of authentication, which can be either ‘RADIUS’ or ‘TACACS+.’
◦ Host: Displays the host of the authentication setting.
◦ Port: Displays the port of the authentication setting.
◦ Secret: Displays the secret key of the authentication setting.
◦ In Use: Displays whether or not the authentication setting is in use.
◦ Action: Click the Edit icon to edit the authentication setting, or click the Trash icon to delete the authentication setting.
◦ Save: Click to save the authentication setting.
User Access
The User Access setting is similar to the Authentication section above where the admin user can configure additional users and set their roles.
SNMP
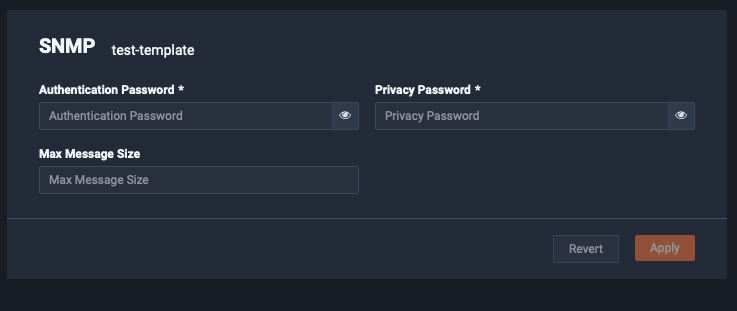
Admin can configure SNMP settings such as:
◦ Authentication password
◦ Privacy password
◦ Max Message size
IDRAC Settings
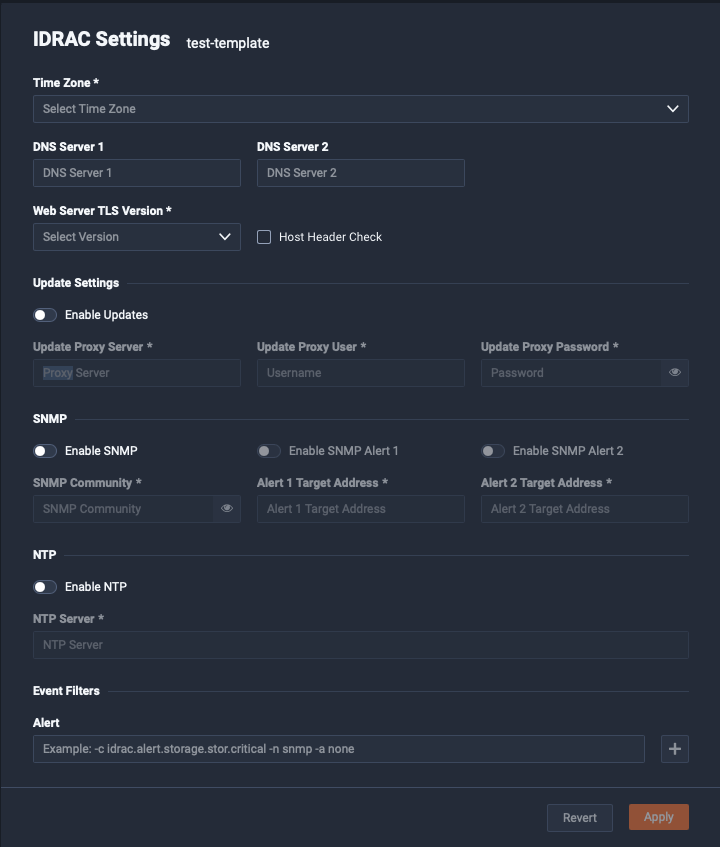
The Integrated Remote Access Controller (iDRAC) firmware and hardware built into LiveWire (LiveWire Core/PowerCore only) lets you remotely access LiveWire as if you were in the same room as the LiveWire. Using an Internet browser, you can easily perform tasks such as accessing a remote console, reimaging LiveWire, rebooting, shutting down, and starting LiveWire (even if LiveWire is off).
These settings are only applicable to physical appliances and not for Virtual ones. These are Dell hardware settings.
Backup Settings
Select the Backup Settings option to configure backup options for a specific device.
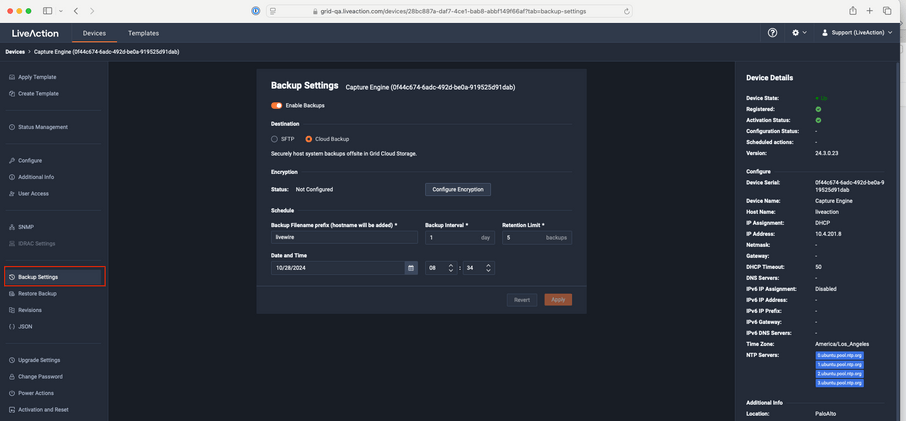
◦ Enable backups - A toggle to enable or disable configuration backup
◦ Destination
◦ SFTP
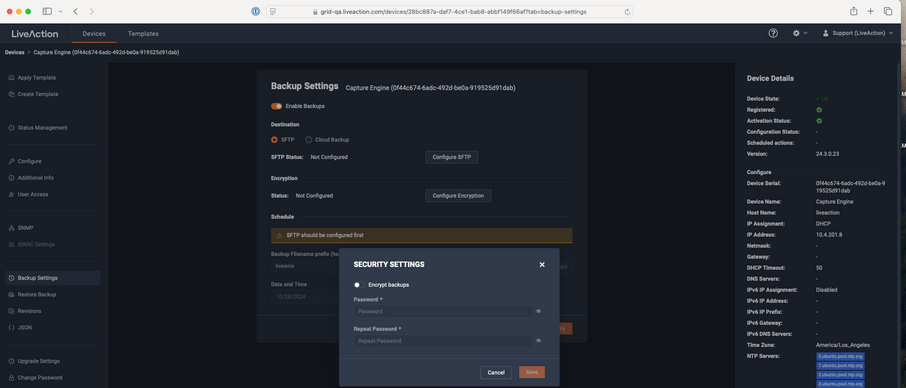
Customers can configure backups to be sent to an SFTP server of their choice inside their environment.
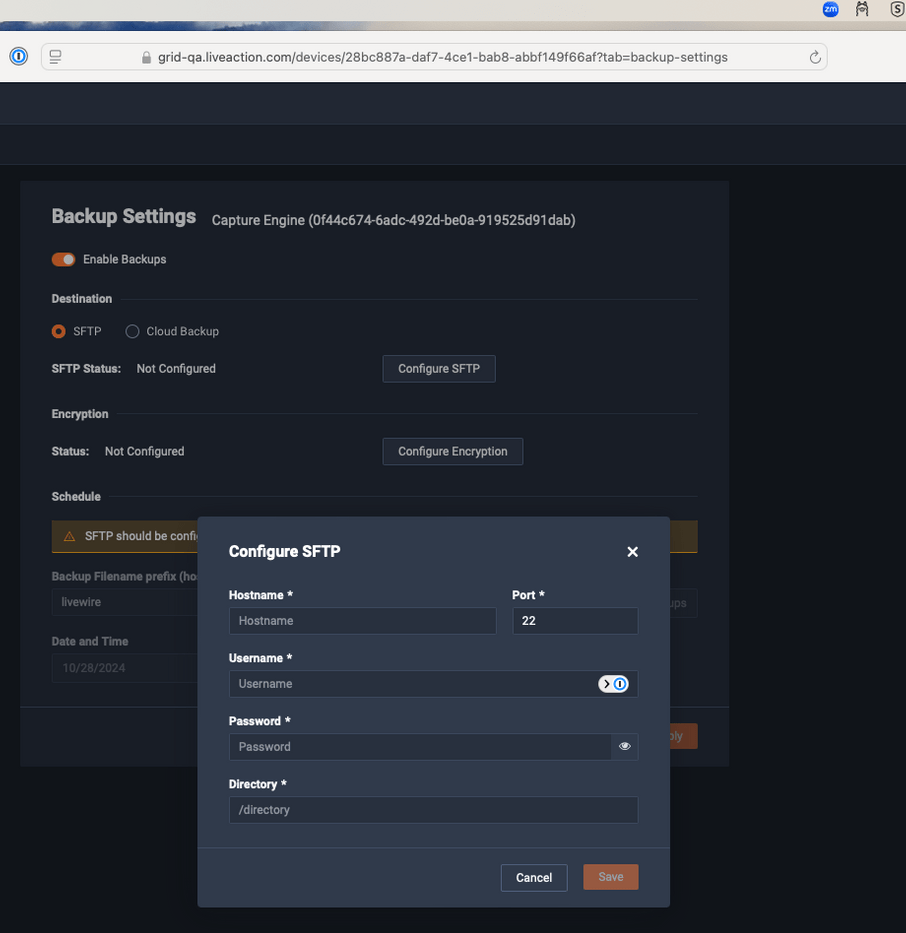
◦ SFTP Status - Indicates if SFTP server is configured or not
◦ Configure SFTP fields:
Hostname - the hostname of the SFTP server
Port - the port number of the server FTP application
Username - the username for SFTP user
Password - the password for the SFTP user
Directory - Where the backups are to be stored on the SFTP server
Hostname - the hostname of the SFTP server
Port - the port number of the server FTP application
Username - the username for SFTP user
Password - the password for the SFTP user
Directory - Where the backups are to be stored on the SFTP server
◦ Cloud Backup - When selected, the configuration backup is stored in Grid SaaS as an encrypted backup.
◦ Schedule - The frequency of backup and how many backups to be stored and a time selector for the backup needs to be taken.
Upgrade Settings
Click the Upgrade button to upgrade the selected appliance remotely through Grid. User can choose to upgrade to any newer version than what is running on the device. There is no capability to upgrade to a previously released version.
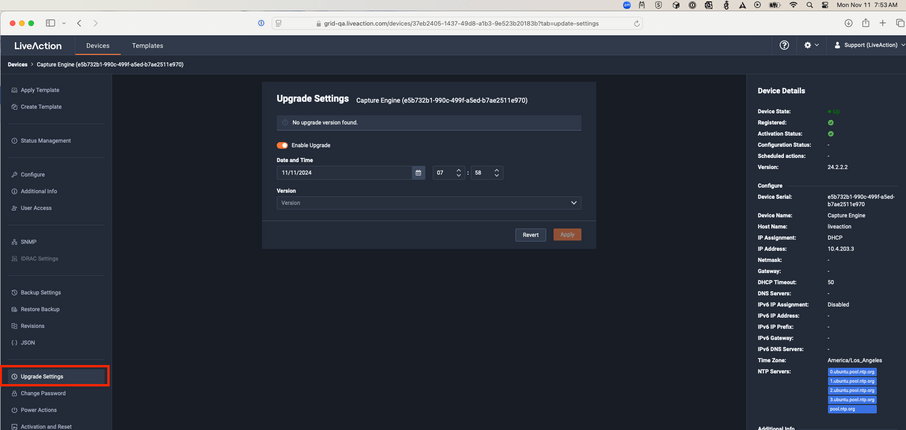
◦ Disable: Select to disable the upgrade on the selected devices.
◦ Enable: Select to enable the upgrade on the selected devices. If you enable the upgrade, you are presented with settings to specify the date and time the upgrade should take place. Because all communications are initiated from the device once every ten minutes, the upgrade will happen as the result of the device communicating with the network, sometime on or after the selected time.
◦ Apply: Click to save the changes to the selected devices.